
Painting Gemstones and jewels
Painting gem stones and jewels – cabachon
Basic oval gem, in greyscale

Cabachon - basic construction
Although I’ve done this in digital format, the principles are the same, regardless which media you use. The best way to paint gems is to look at them in real life (even paste gems are good enough), and if you don’t have real ones, use photographic references to look at the way the light hits.
Brushes:
Hard round for highlights
Airbrush at 50% – 100% (I normally don’t use airbrush, I have custom blending brushes, but you could use Hard round at varying percentages)
Steps
Generally I start with the darkest tone or at least a mid tone. To make the stone really neat, I’ll often use the selection tool to isolate the stone from the rest of the painting.
The light source is to the top right of the gem. I take the airbrush and add a dark mid tone to the upper right hand of the stone.
Because gems are transparent, there will be light coming through the stone and out the opposite side of the stone. This is why I add a small amount of light to the lower left. (I probably didn’t add enough for this sample, but you get the idea).
Add more highlights to the upper right in a mid tone.
Take a harder edge brush, and with a lighter tone add a reflection point
I added an extra highlight because I wasn’t as happy with the highlight.
Here are a few more examples:
Round Moonstone Example

Round moonstone
Oval Moonstone Example

Oval moonstone
Green Drop shaped gemstone

Green Drop shaped gemstone
Don’t be afraid to play with colours. Light is not all white so if your gem is being hit by a warm light, the reflections may not be that white. Also, if the shape is not round, light may reflect off multiple surfaces.
Square Amethyst

Square amethyst
Triangular gem
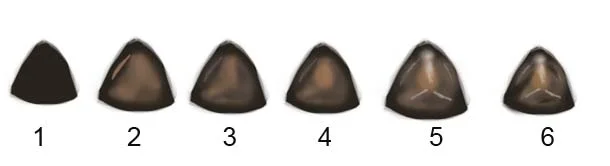
Triangular gem - This is a bit messy, start from a better base
Star Sapphire
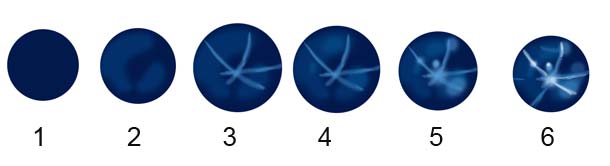
Star Sapphire
Tigers Eye

Tiger's Eye
Round Opal

Round opal